Use the Security Cloud Control Command Line Interface Tool (CLI)

You can use the Command Line Interface tool for managing or troubleshooting devices. The commands supported with this tool depend on the type of device. For the ASA, for example, you can use the full CLI. But for the Firewall Threat Defense, command support is limited to select show commands.

You can send commands to a single device or to multiple devices simultaneously.

See the following supported device types:

  • ASA

    Commands are entered directly in global configuration mode. For detailed ASA CLI documentation, see ASA Command Line Interface Documentation.

  • Cloud-Delivered Firewall Management Center-managed Firewall Threat Defense

    Your command will be sent to either the Firewall Threat Defense CLI or the diagnostic CLI, depending on which command it is. Supported commands for Firewall Threat Defense are shown onscreen. These commands are a subset of commands that you can enter at the CLI. In addition, you cannot filter show command by piping the output (|) like you can directly at the CLI or in the Threat Defense CLI tool in the Cloud-Delivered Firewall Management Center.

    For diagnostic CLI output, see the ASA command reference guide.

    For Firewall Threat Defense CLI documentation, see Cisco Firepower Threat Defense Command Reference.

  • FDM-managed Firewall Threat Defense

    Commands are entered at the Firewall Threat Defense CLI. You cannot access other modes. For Firewall Threat Defense CLI documentation, see Cisco Firepower Threat Defense Command Reference.

  • Cisco IOS

    Commands are entered in user EXEC mode. You need to enter enable followed by configure terminal to execute them in Global Configuration mode. For Cisco IOS CLI documentation, see Networking Software (IOS & NX-OS) for your IOS version.

  • SSH

Use the command line interface on a single device

Use the Command Line Interface to execute commands directly on a single device and manage device configurations efficiently.

When you select a single device, you can enter one or more commands. You can also view and use command history to rerun a set of commands.

Procedure


Step 1

Choose Inventory.

Step 2

Choose Security Devices.

Step 3

Click the Devices tab.

Step 4

Select the device, and in the Device Actions pane, click >_Command Line Interface.
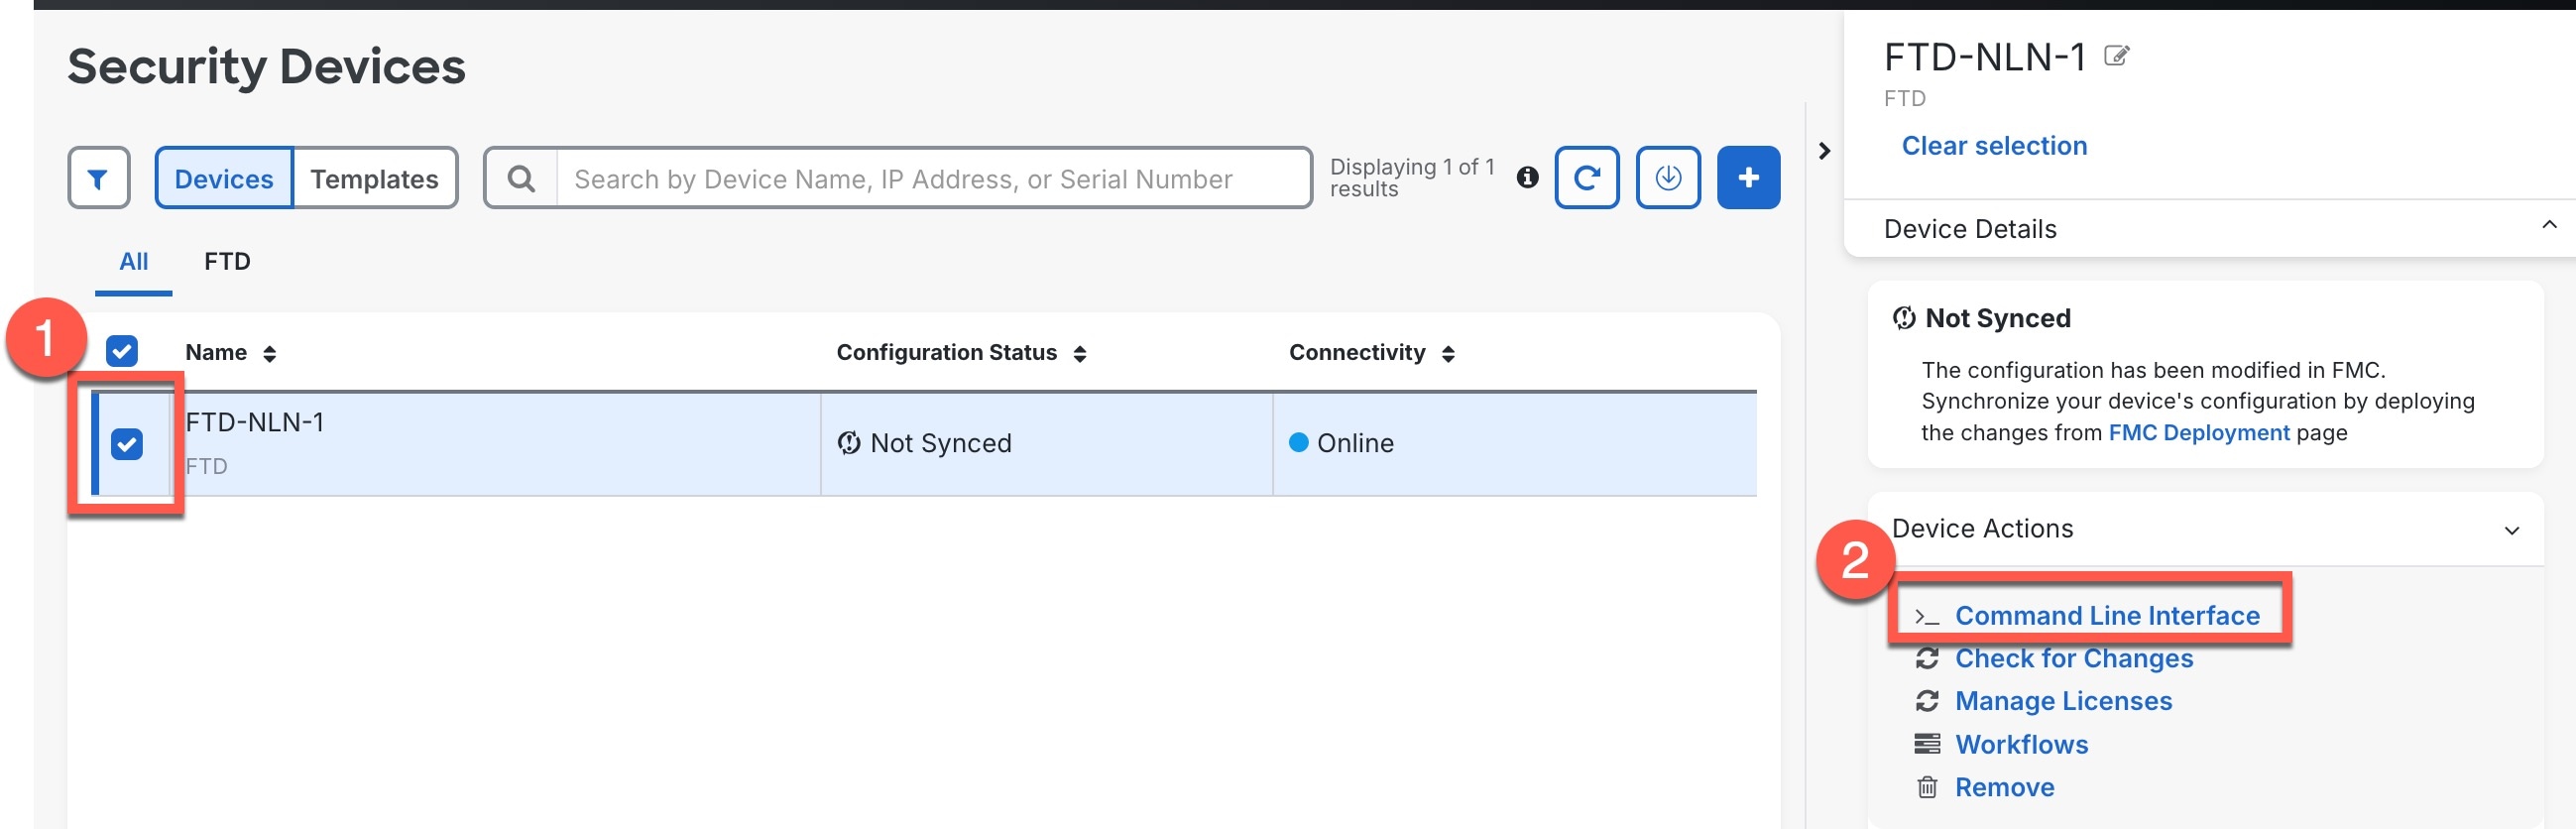
Security Devices page with the command line interface button highlighted.

Step 5

Enter one or more commands in the command pane, and click Send.
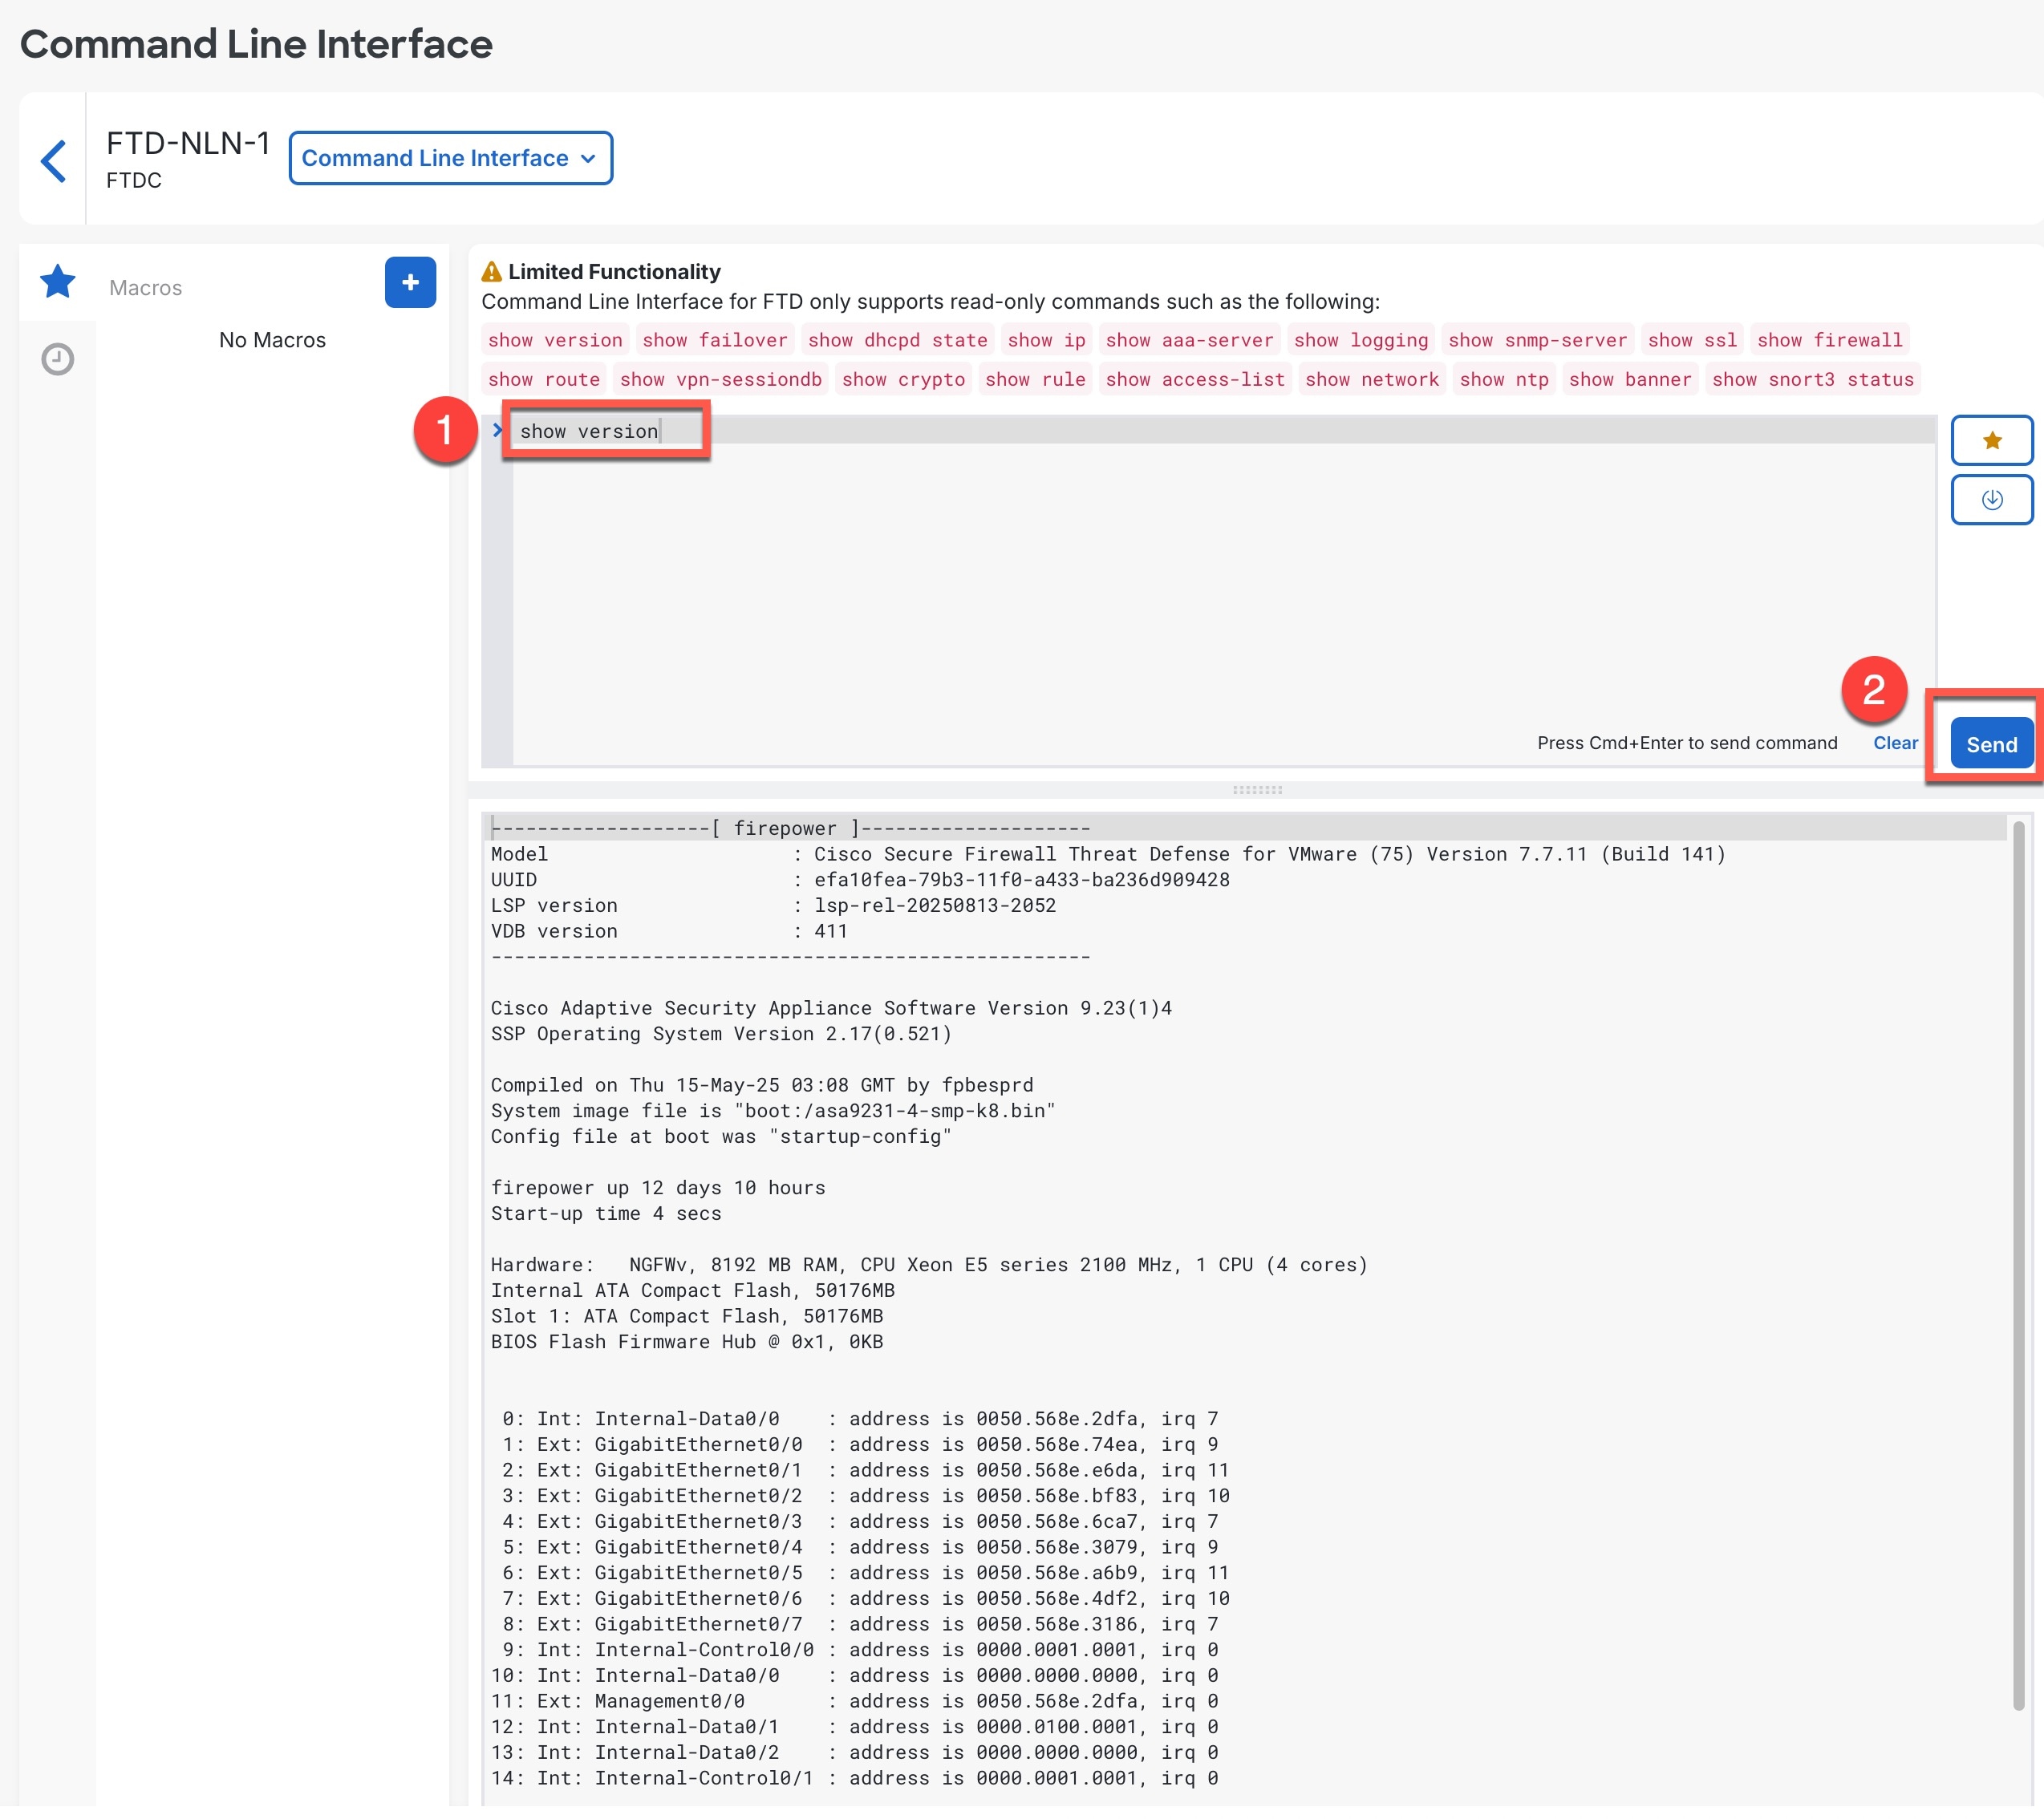
Command Line Interface page with the highlighted show version and send options.

If there are limitations on the commands you can run, they appear in the area above the command pane.

The response to your commands is displayed in the response pane. If there is no output for a command (either it was executed successfully, or there was no output to show), you will see Done! in the results pane.


Note


If you enter a very long list of commands, you may exceed the limitations of Security Cloud Control's interface with the device. If you see an error, you can add extra blank lines between groups of commands so Security Cloud Control can send the commands in batches.


Example:

This ASA example sends a batch of commands that creates three network objects and a network object group that contains those network objects.
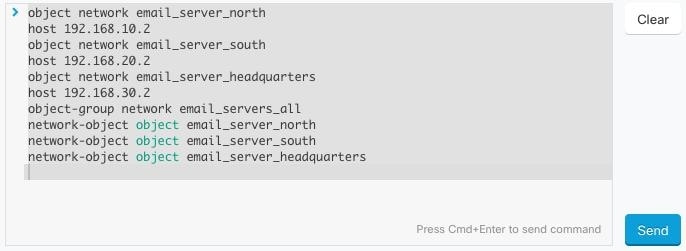
The command line interface example demonstrates the execution of a batch of commands to create three network objects and a network object group that includes those objects.

Step 6

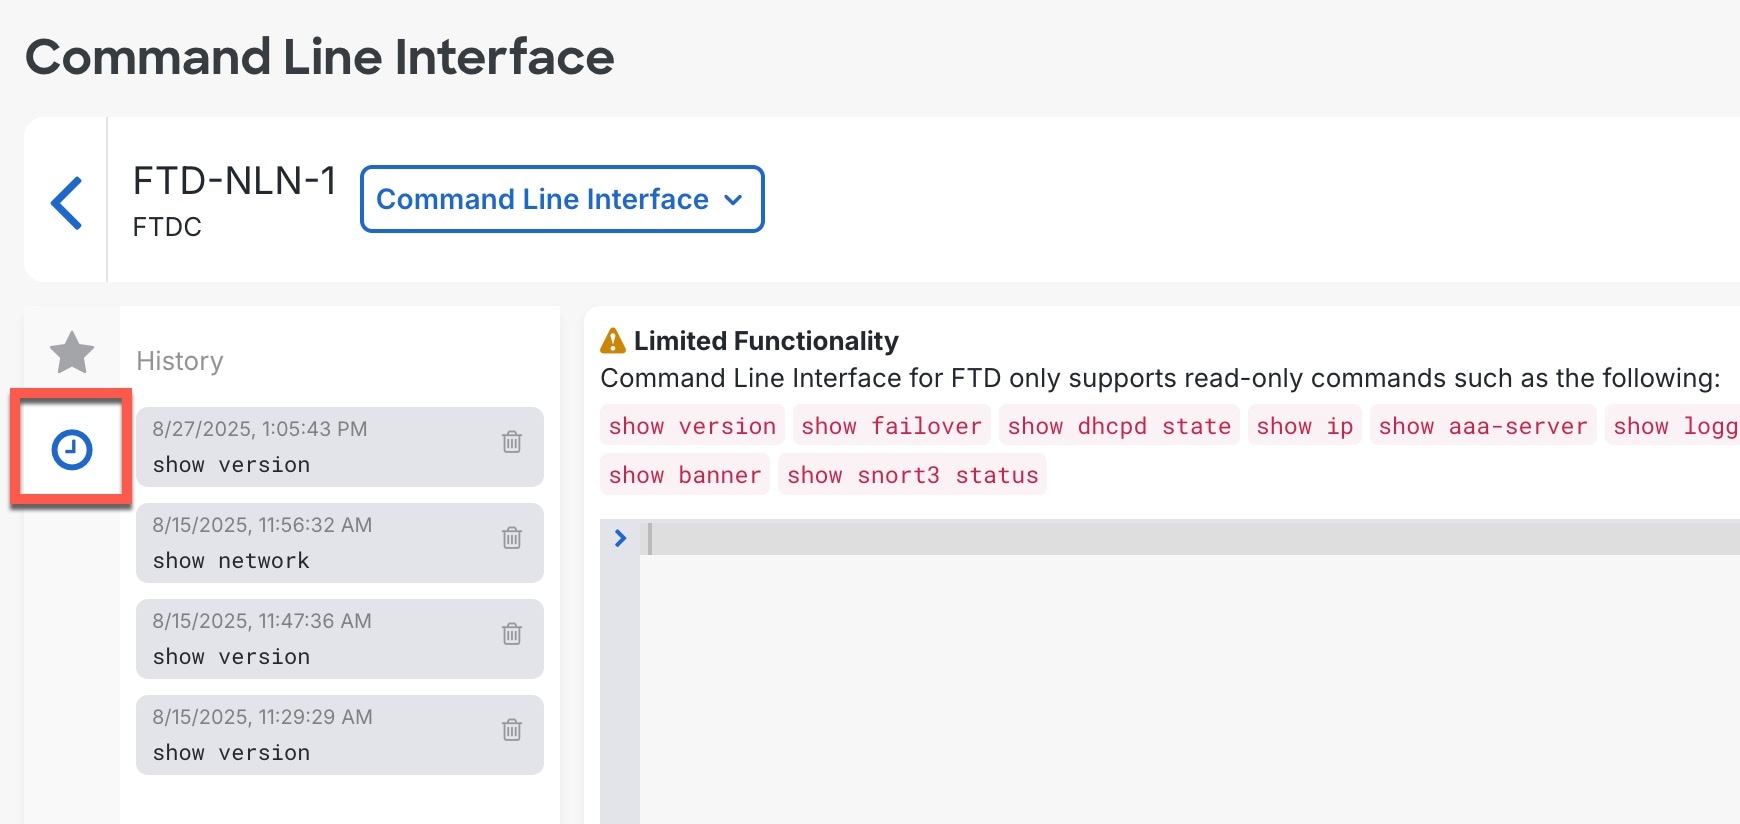
After you send commands, Security Cloud Control records that command in the History pane. You can rerun the commands saved in the History pane or use the commands as a macro.

  1. Click the clock icon The command line interface displays a series of commands and their outputs, illustrating how to navigate and manage files on a single device. to open the History pane.

    Command Line Interface with highlighted history pane.
  2. Select the command in the History pane that you want to modify or resend.

  3. Reuse the command as it is or edit it in the command pane and click Send.


You can successfully execute commands on the selected device and reuse command history for efficient device management.
Use the bulk command line interface

Send CLI commands to multiple devices of the same type at once for efficient bulk device management.

Use the bulk Command Line Interface to execute commands across multiple devices simultaneously rather than configuring each device individually.

Procedure


Step 1

In the left pane, click Inventory.

Step 2

In the left pane, click Security Devices.

Step 3

Click the Devices tab.

Step 4

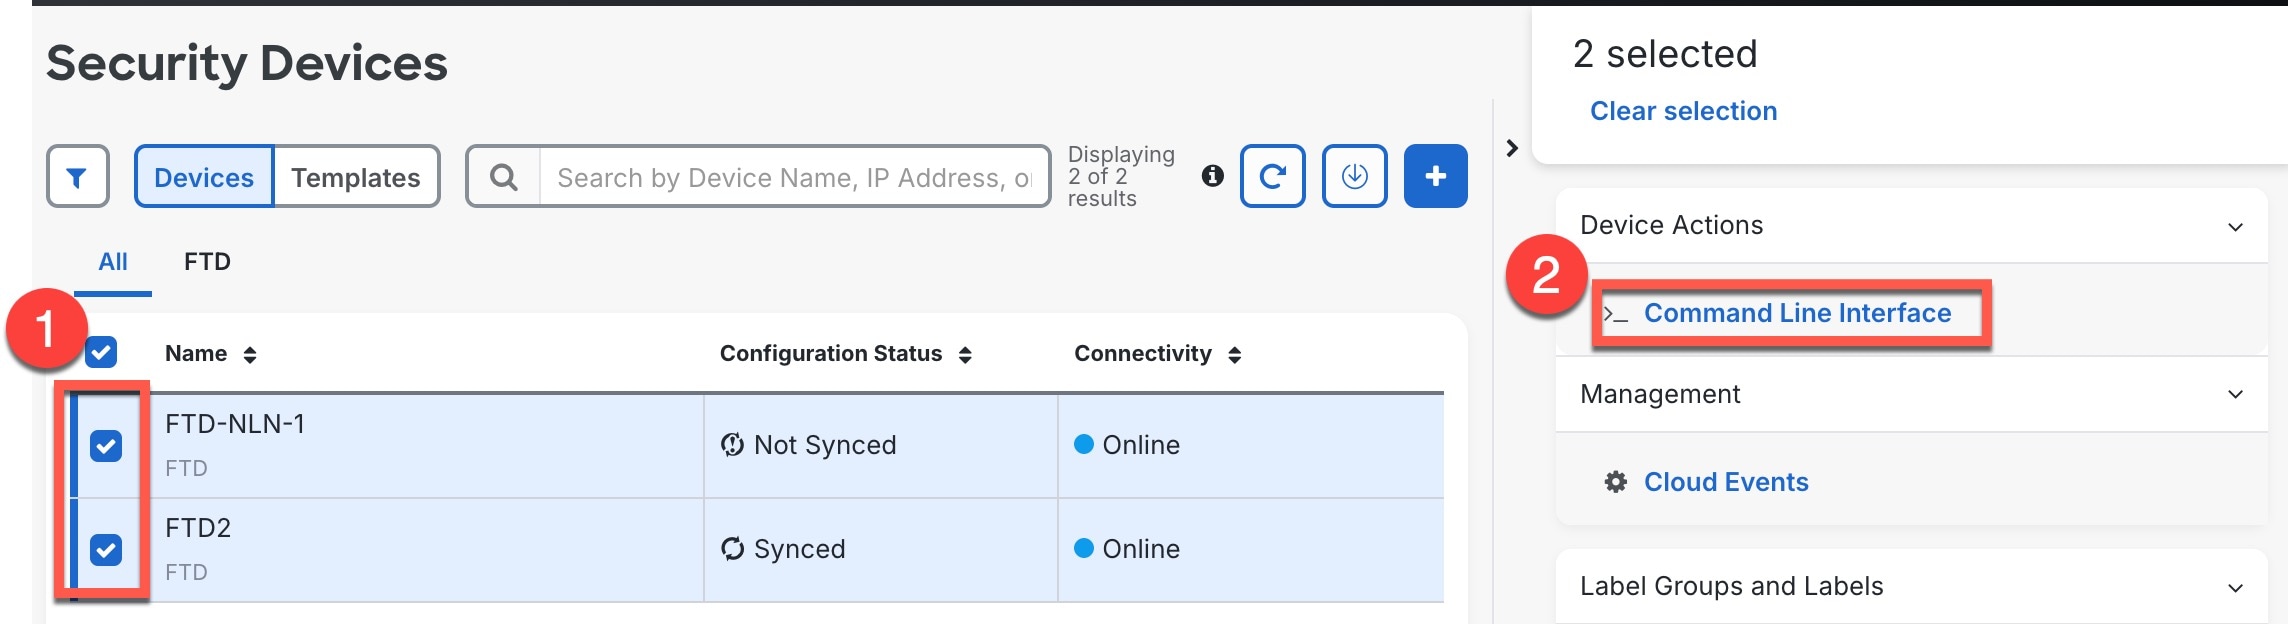
Select multiple devices of the same type, and in the Device Actions pane on the right, click >_Command Line Interface.

Figure 1. Open the command line interface
Open the Command Line Interface

Step 5

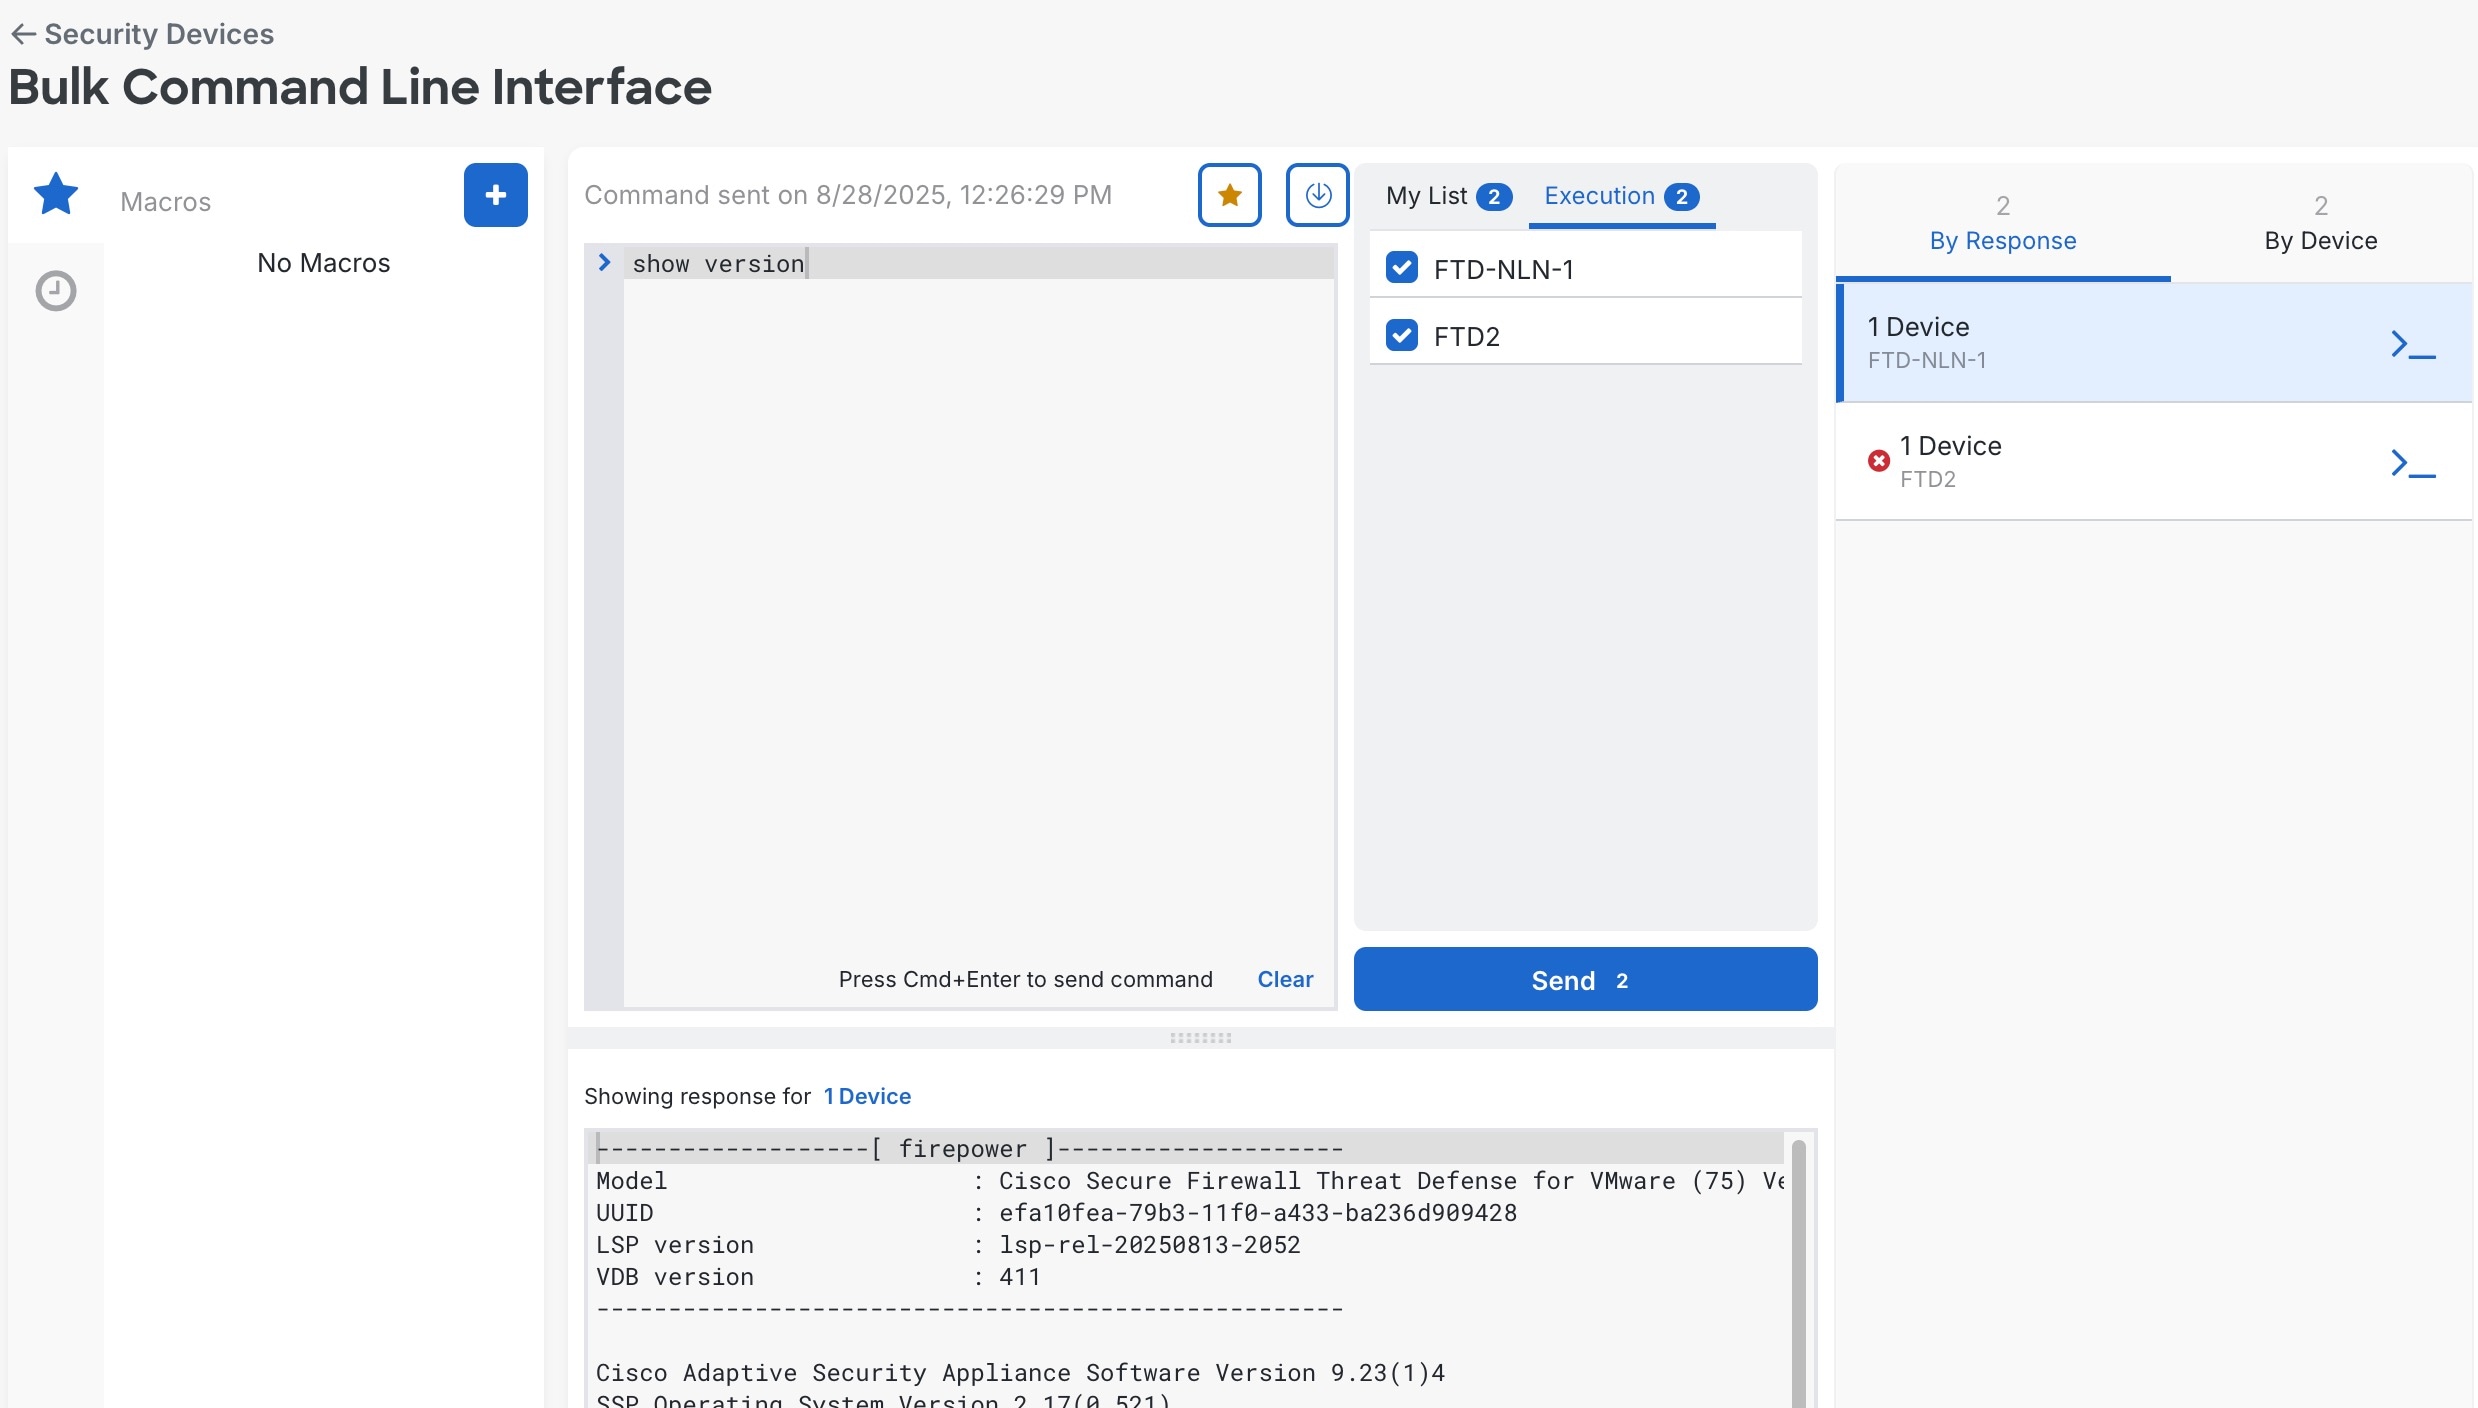
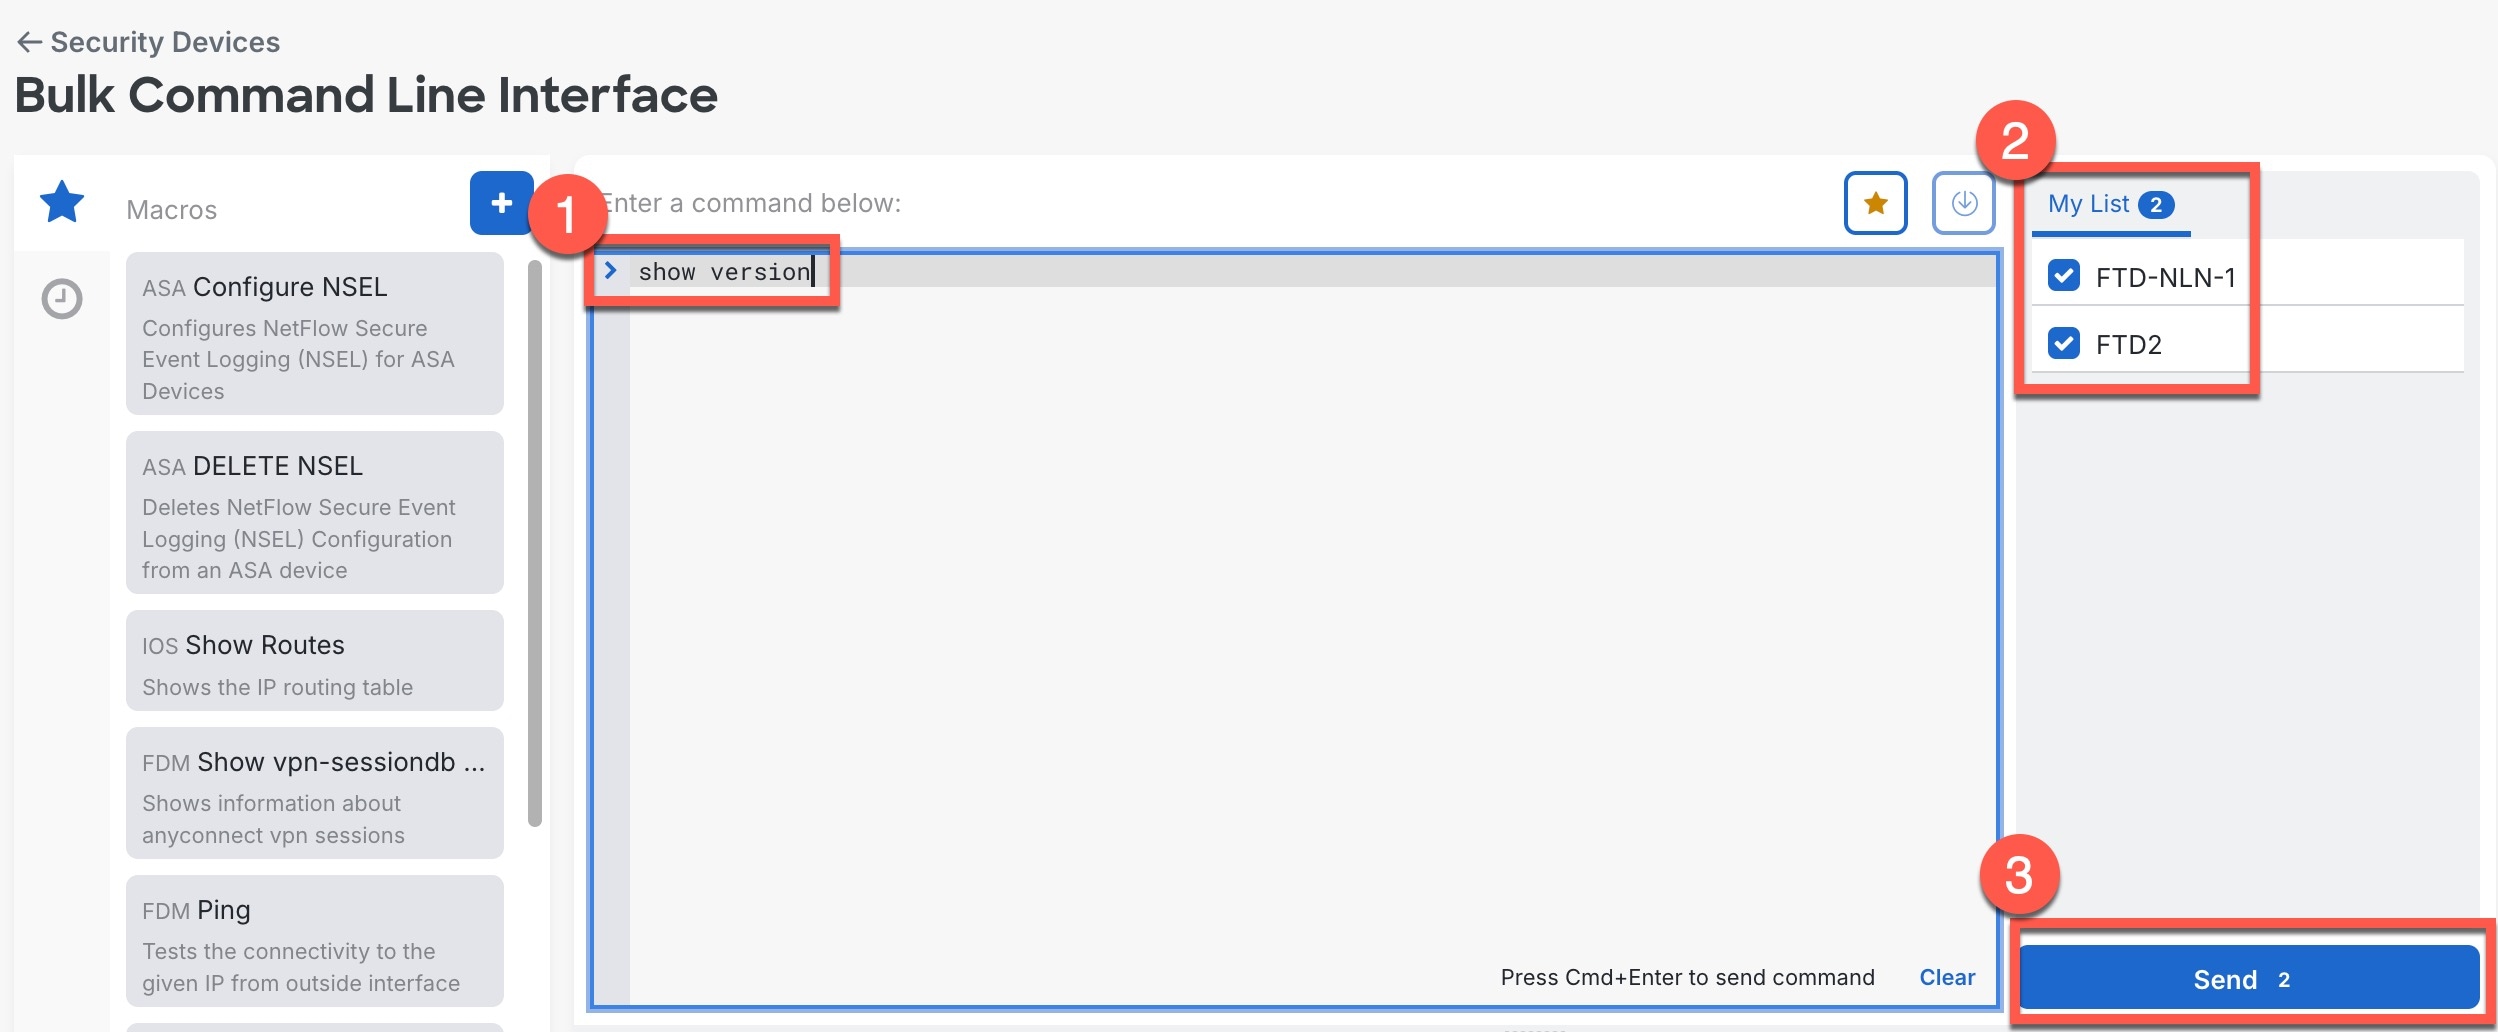
Enter one or more commands in the command pane, check or uncheck devices you want to send the commands to in the My List field, and click Send.

Figure 2. Command line interface
Command Line Interface

Note


If you enter a very long list of commands, you may exceed the limitations of Security Cloud Control's interface with the device. If you see an error, you can add extra blank lines between groups of commands so Security Cloud Control can send the commands in batches.


Note


For the ASA, if any of the selected devices are not synced, only certain commands are allowed: show , ping , traceroute , vpn-sessiondb , changeto , dir , write , and copy .


Step 6

View the device output.

The Execution tab shows the devices where the commands were sent; this list should match the selected devices in My List.

Figure 3. Command line interface
Command Line Interface

If there is no output for a command (either it was executed successfully, or there was no output to show), you will see Done! in the results pane.

The devices' response to the commands are displayed below in the response pane. If the response was the same for more than one device, the response pane displays the message "Showing Responses for X devices." Click X Devices to show all the devices that returned the same response in a pane to the right. Click View Device to go to that device in Inventory.

On the By Response tab, devices with identical responses are consolidated in a single row. Click a different row to show the response from other devices.

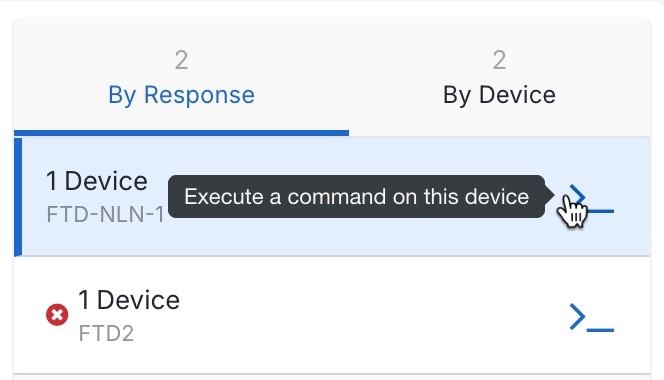
To re-run the command on the selected devices, click the prompt symbol to the right of the device row, and then click Send. You can change the commands you want to send or check and uncheck devices in the My List tab.

Figure 4. Execute a command
History Pane

Click the By Device tab, and select a device to show only that device's command response.

Step 7

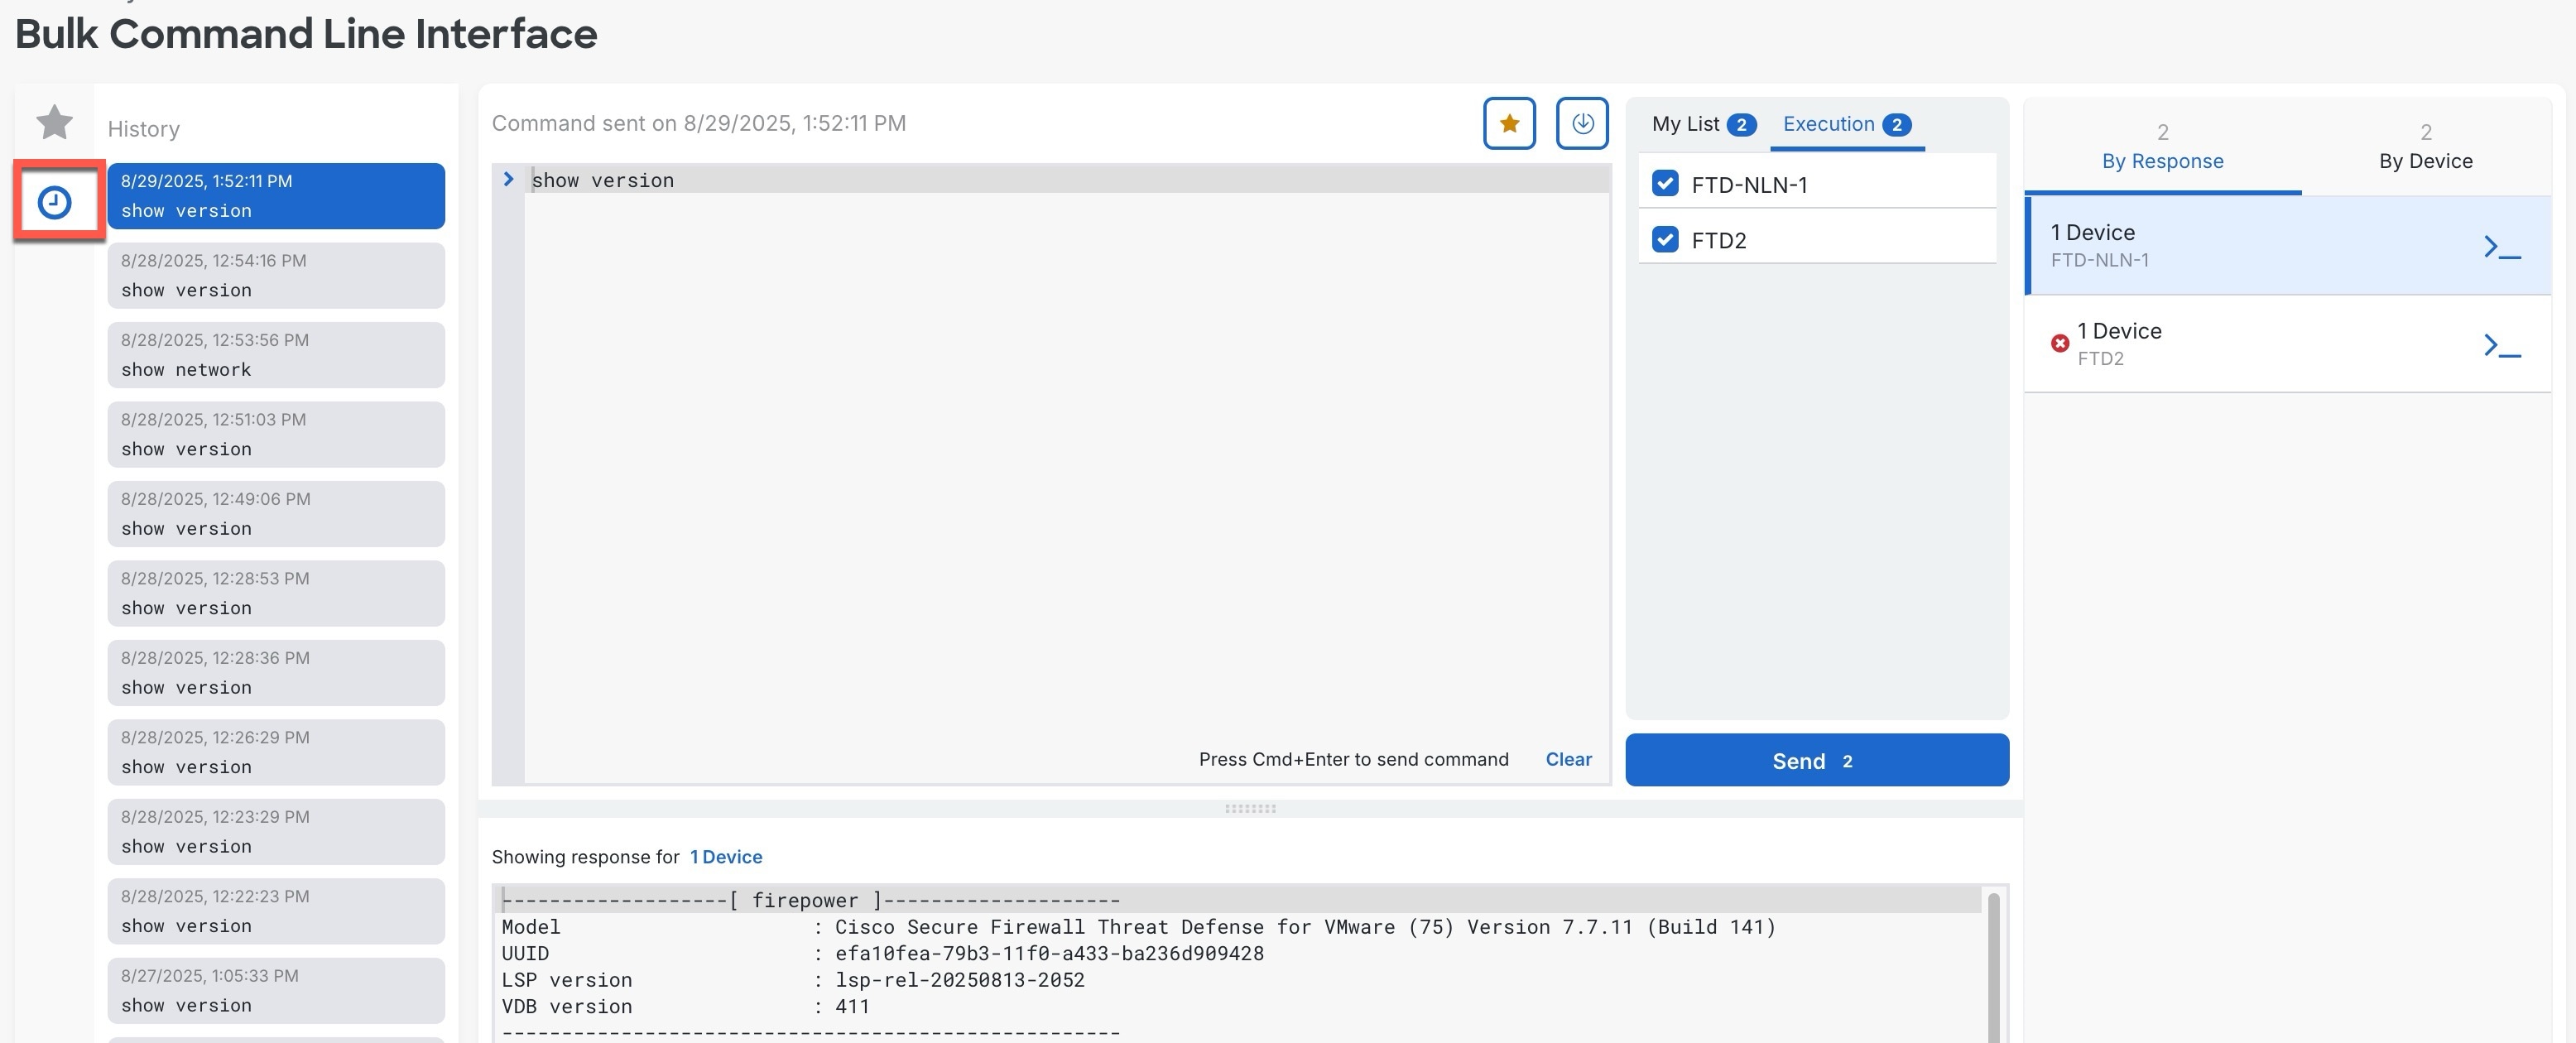
After you send commands, Security Cloud Control records that command in the History pane. You can rerun the commands saved in the history pane or use the commands as a macro. The commands in the history pane are associated with the original devices on which they were run.

  1. Click the clock icon The command line interface displays the command response for a selected device in the By Device tab, highlighting the relevant history pane. to open the History pane.

    Figure 5. History pane
    History Pane
  2. Select the command in the History pane that you want to modify or resend.

    Note that the command you pick is associated with specific devices (shown on the Execution tab) and not necessarily the ones you chose in the first step.

  3. Click the My List tab to check or uncheck additional devices.

  4. Reuse the command as it is or edit it in the command pane, and click Send.


Commands are sent to the selected devices and responses are displayed in the interface. Command history is saved for future reuse across the same device types.

Run a CLI macro

Run CLI macros to execute prepared commands on one or more devices of the matching type, with the ability to define parameters for customized execution.

A CLI macro is a fully-formed CLI command ready to use on one or more devices of the matching type.

For some device types, Security Cloud Control provides system-defined macros. System-defined macros cannot be edited or deleted.

Procedure


Step 1

In the left pane, click Inventory.

Step 2

In the left pane, click Security Devices.

Step 3

Click the Devices tab.

Step 4

Select one or more devices of the same type, and in the Device Actions pane on the right, click >_Command Line Interface.

You cannot create macros without first choosing a device.

Step 5

Create a macro for this device type if one does not already exist.

  1. Add a macro in one of the following ways:

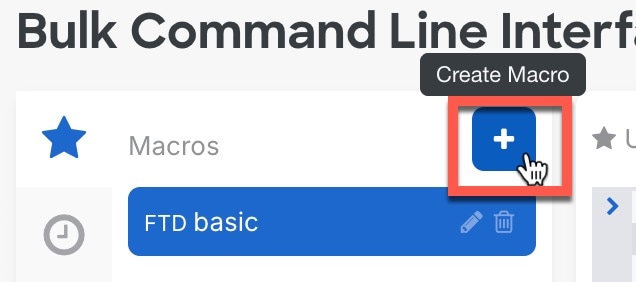
    • New macro—On the Macros tab (The Create Macro button is highlighted on the Macros tab, indicating where users can initiate the process of creating a new macro after selecting a device.), create a new macro by clicking the Create Macro (The Create Macro button is highlighted on the Macros tab, indicating where users can initiate the process of creating a new macro after selecting a device.) button.

      Figure 6. Create new macro
      Create New Macro
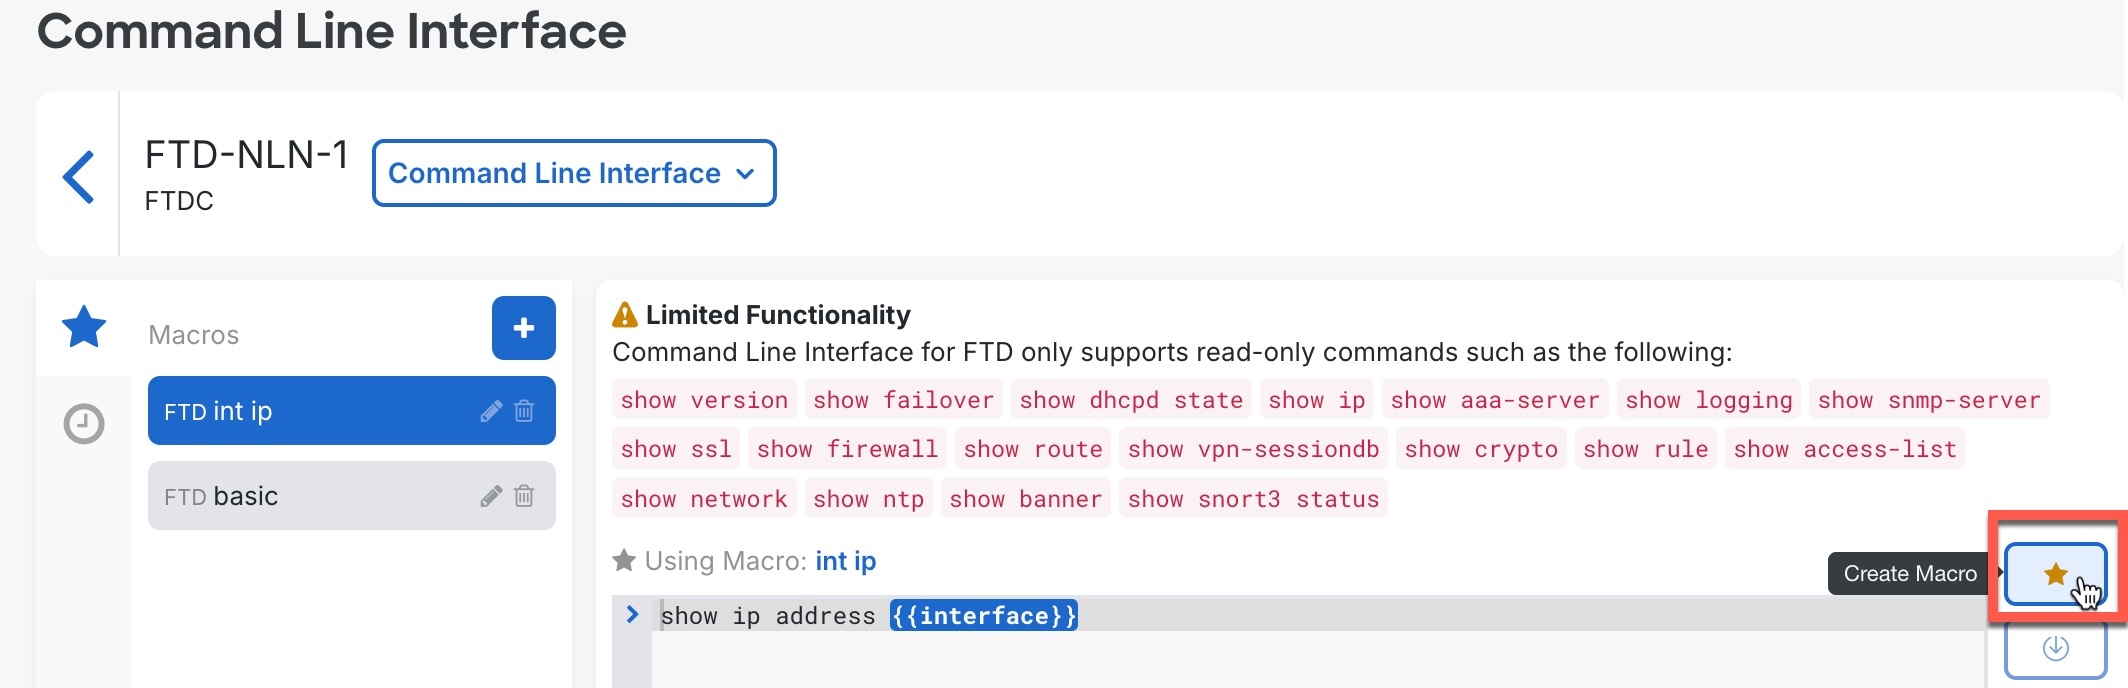
    • From an existing macro—On the Macros tab (The Macros tab displays the option to create a new macro from an existing one, highlighting the Create Macro button for initiating the process.), create a macro starting with the same commands by selecting a macro and then clicking the Create Macro (The Macros tab displays the option to create a new macro from an existing one, highlighting the Create Macro button for initiating the process.) button.

      Figure 7. Create macro from existing
      Create Macro from Existing
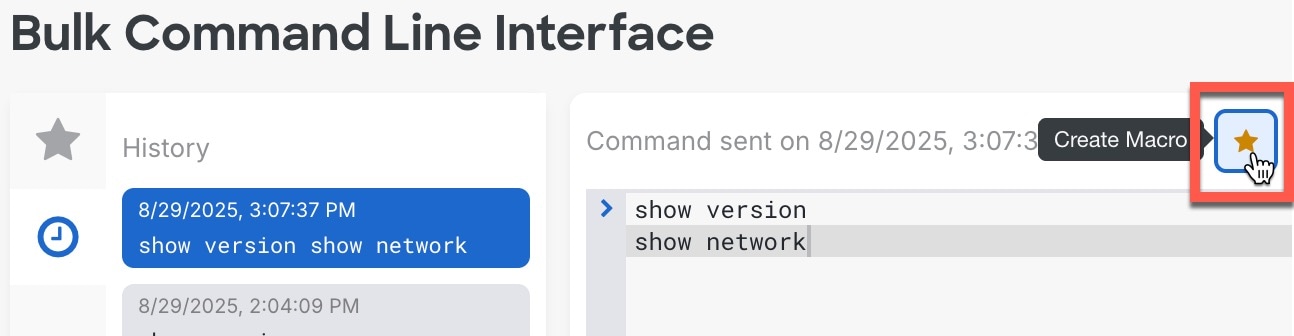
    • From history—On the History tab (The image illustrates the process of creating a macro from the command history in a CLI interface, highlighting the History tab and the Create Macro button.), select a command you already ran, and then click Create Macro (The image illustrates the process of creating a macro from the command history in a CLI interface, highlighting the History tab and the Create Macro button.) button.

      Figure 8. Create macro from history
      Create Macro from History
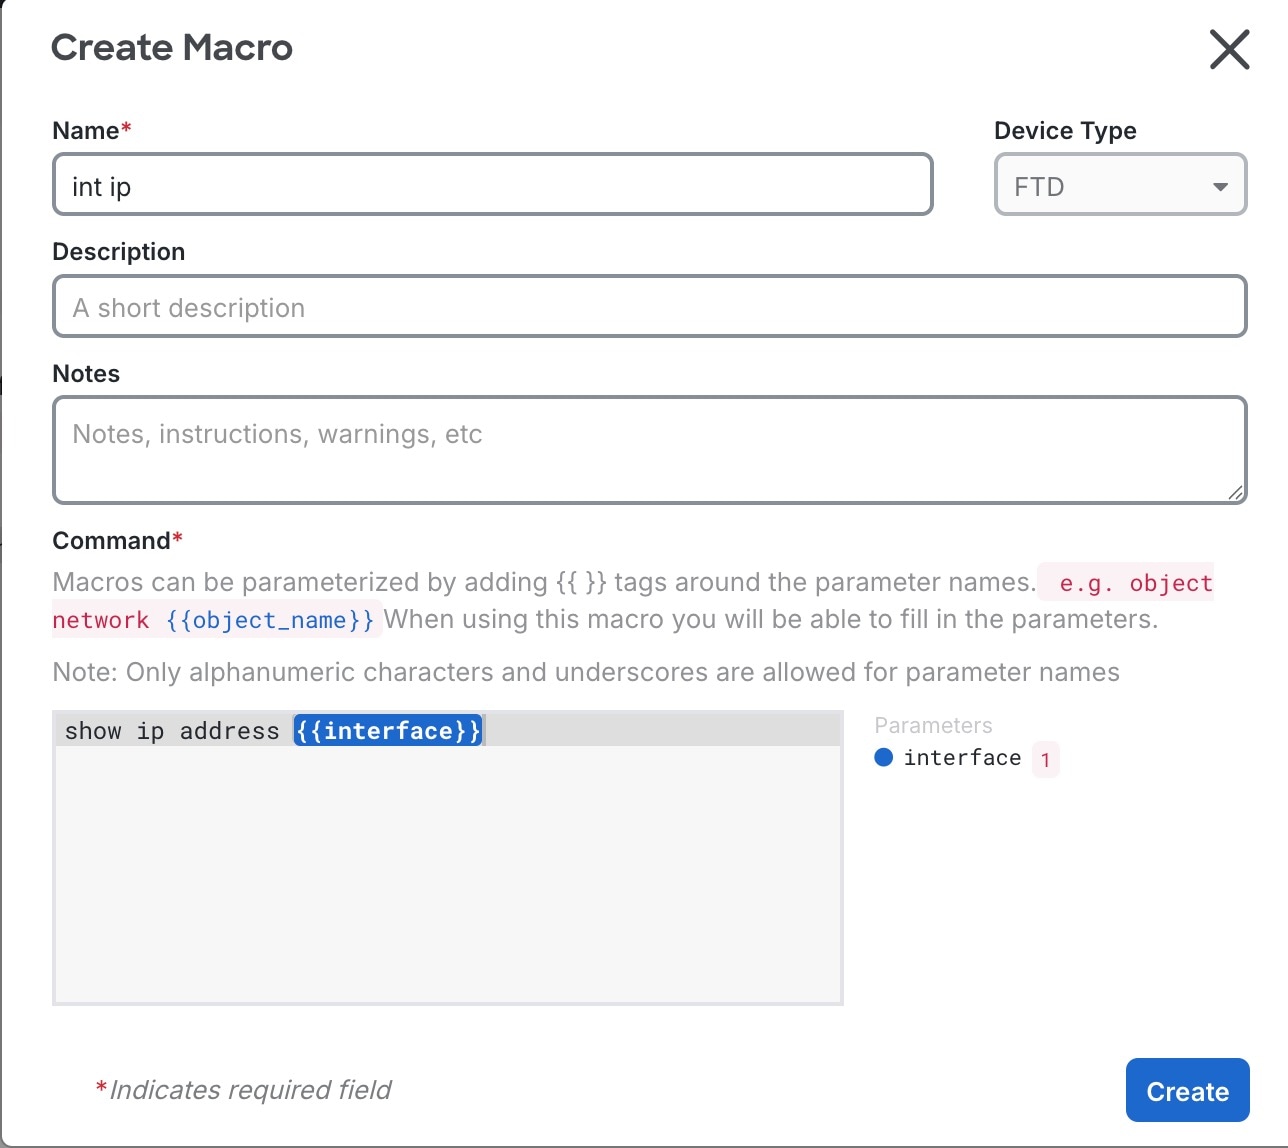
  2. Give the macro a unique name and provide an optional description and notes.

    Figure 9. Create macro
    Create Macro
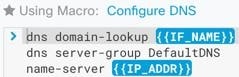
  3. Enter the commands in the Command field. For variables, enter the parameter surrounded by double curly brackets: {{parameter}} .

    You will define the parameter before you run the macro.

    The interface for creating and managing CLI macros, highlighting the parameter definition and editing options available next to each macro name.

    You can name your parameters anything you want.

  4. Click Create.

Step 6

Click the star The Configure DNS macro interface displays options for defining parameters before executing the macro, including icons for editing or deleting the macro. to open the Macros tab, and select a macro from the list.

You can edit or delete a macro using the icons next to the macro name.

Step 7

Run the macro one of two ways:

  • If the macro has no parameters to define, click Send. The response to the command appears in the response pane. You're done.

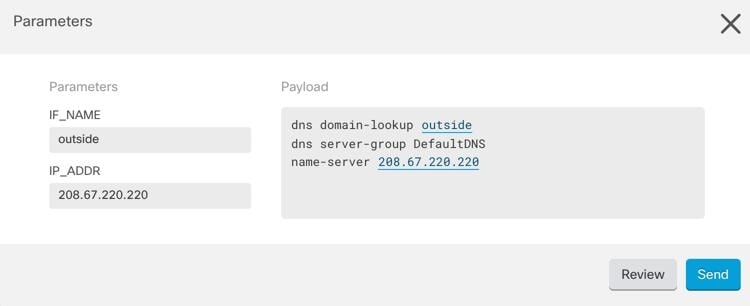
  • If the macro contains parameters, such as the Configure DNS macro below, click >_ View Parameters.

The Configure DNS macro interface displays fields for entering parameters required to execute the macro, along with options to edit or delete the macro.
  1. In the Parameters pane, fill in the values for the parameters in the Parameters fields.

    The Configure DNS macro interface displays fields for entering DNS parameters, with a Send button to execute the command and a response pane for viewing the results.
  2. Click Send.

Step 8

Save configuration changes if you made any.

After you send the command you may see the message, "Some commands may have made changes to the running config" along with two links.

The command line interface displays a message indicating that some commands may have altered the running configuration, with options to save changes or dismiss the notification.
  • Clicking Write to Disk saves the changes made by this command, and any other change that in the running config, to the device's startup config.

  • Clicking Dismiss, dismisses the message and does not save the configuration. You may lose the configuration changes if you reboot the device.


The CLI macro runs on the selected devices with the specified parameters, and any configuration changes can be saved to the device's startup configuration.

Export command line interface results

This task allows you to export CLI command results to a CSV file for offline analysis and record keeping.

You can export the results of CLI commands to a comma separated value (.CSV) file, so you can filter and sort the information in it. The exported information contains the following categories:

  • Device

  • Date

  • User

  • Command

  • Output

Procedure


Step 1

Run your commands according to Use the command line interface on a single device, Use the bulk command line interface, or Run a CLI macro, or choose a command from the History pane (The command line interface results display a table with date, user, command, and output information, illustrating how to interpret the data in the .CSV file.).

Step 2

Click the Export results (The command line interface results are displayed in a CSV format, showing the output of the executed command for analysis in spreadsheet applications.) button.

Step 3

Give the .CSV file a descriptive name and save the file to your local file system.

When reading the command output in the .CSV file, expand all the cells to see all the results of the command.


The CLI command results are exported to a CSV file that you can open and analyze using spreadsheet applications for filtering, sorting, and offline review.