Obtain Spaces Connector VM Image for OpenShift Platform
Available Languages
Introduction
This document describes the steps to extract the connector VM image, QCOW2 image, for OpenShift Platform.
Brief
These documents explain how to deploy the platform, but do not explain how to retrieve the QCOW2 image.
- The July 2026 Cisco release notes confirm support for OpenShift deployment.
- This document explains the procedure to deploy in OpenShift.
To understand how to retrive the image, the steps described in the next section facilitate image extraction.
Steps for Image Extraction
1.Download cisco-spaces-connector3-p84-jul2026.ova from software.cisco.com:

2.Save in your desired folder. For example, use this location and created a folder named jul2026 (you can name it as per your choice):
/Users/madroy/Documents/Software Images/Connector
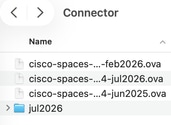
3.Open terminal and move to the image location(command is as per my image location):
#cd Documents/Software\ Images/Connector

4.Extract the OVA using this command:
#tar -xvf cisco-spaces-connector3-p84-jul2026.ova -C jul2026

5.You need to install QEMU utility to convert the VMDK disk to QCOW2. First, you need to install QEMU with Homebrew(you can skip it if its already downloaded in your system):
#brew install qemu

To verify if QEMU is installed, run this command in PC terminal:
#qemu-img --version

If QEMU is installed, you’ll see a version such as:
qemu-img version 11.1.1
Copyright (c) 2003-2026 Fabrice Bellard and the QEMU Project developers
6.Next step you need to convert VMDK to QCOW2 using this command:
#qemu-img convert -f vmdk -O qcow2 \cisco-spaces-connector-disk1.vmdk \cisco-spaces-connector-disk1.qcow2

The resulting file is: cisco-spaces-connector-disk1.qcow2
7.Verify the QCOW2 image is installed or not using this command:
#ls -lh cisco-spaces-connector-disk1.qcow2

8.The verified QCOW2 image is ready for the OpenShift Virtualization import workflow.
Revision History
| Revision | Publish Date | Comments |
|---|---|---|
1.0 |
03-Nov-2026
|
Initial Release |

 Feedback
Contact Cisco
- Open a Support Case

- (Requires a Cisco Service Contract)